
Given the recent security breaches, data security should always be a concern when designing and creating IT solutions. In particular, what are some considerations that should be made when implementing a solution within the Oracle SOA Suite? Is it sufficient to protect the data using WS-Security/SSL or is additional security needed? If you have sensitive data traversing through the SOA Suite then additional security must be considered.
As noted within the National Institute Standards and Technology (NIST) publication, ‘to appropriately protect the confidentiality of personally identifiable information (PII), organizations should use a risk-based approach’. To understand what is considered PII, or sensitive data, along with recommendations to protect PII read Guide to Protecting the Confidentiality of Personally Identifiable Information.
WS-Security and SSL only will protect data outside a SOA composite or Service Bus. Once the data hits either one of these, it is viewable in clear text within audit trails, console or logs. This means sensitive data is viewable within the console and log, causing this data to be unencrypted at rest. An example of this is shown below. Anyone with access to EM (Enterprise Manager) could view the sensitive data just by opening the audit trail of a process:

To alleviate this potential exposure of sensitive data, there is a concept in FMW called partial encryption or field level security. This allows sensitive data within a message to be protected on the perimeter, encrypted as it enters the SOA composite or service bus proxy, while other non-sensitive fields to remain in clear text. For example, a Social Security Number in a message is encrypted on the way in to a composite, then decrypted on the way out making it unreadable. Other elements in the message are not deemed as sensitive, so can pass through in clear text.
In 11g, this was accomplished through a custom security policy, which involves implementing custom Java code along with creating a custom encryption/decryption OWSM policy assertion.
Within 12c, an OWSM PII policy (pii_security_policy) is provided which can be applied to both a SOA composite client/server web service and Service Bus proxy/business service, making the custom code required in 11g no longer necessary. Within this article, I will show you the different options available for implementing this functionality within both a SOA composite and the Service Bus.
Prerequisites
Before implementing the policy in either a composite or Service Bus project, there are some prerequisites that need to be taken care of first:
- Identify which fields are to be protected
- Configure the PII encryption key. A password CSF (Credential Store Framework) key is used for the PII encryption key (more details around adding the key can be found here ).
- Determine how the PII policy will be implemented:
- Creating a new policy, done by cloning the existing PII policy, with unique configuration settings, OR;
- Applying the provided PII policy with the settings overridden on each endpoint
Further details on the implications of the implementation choices of the PII policy will be discussed next.
Policy Configuration
The PII policy configuration has several properties that need to be changed depending on the encryption/decryption requirements. Since the data to be protected may be different during the request and response, each of the corresponding XPaths and namespaces need to be specified. Multiple XPaths and namespaces are allowed within the configuration, providing the ability to configure multiple data fields for encryption. Along with this, the CSF key needs to be specified:

As noted above, there are a couple different options to implementing this policy, either by create new or override existing.
Create New Policy
Creating a new policy from the existing pii_security_policy provides the benefit that any updates can be done in one location. The policy encryption properties can be made within the EM WSM Policies, which will push changes out to any endpoints where the policy is applied. The downside of this technique is the possibility of having a plethora of policies to maintain. Best practices around naming conventions for the cloned policy along with reuse criteria could be defined to ease the maintenance burden.
To create a new policy from the existing, navigate to the WSM Policies screen in EM (Right click on the Domain, select Web Services, then, WSM Policies). Within the WSM Policies screen, find the pii_security_policy and then select ‘Create Like’:

After the new policy is created, the encryption properties can be defined. Open the new policy, select the Assertions tab, then Configuration:

Override Existing Policy
To implement the provided pii_security_policy, the policy will be attached to the composite and service bus components, then the predefined configurations at the attachments will be overridden as necessary. Further details on this are provide in the subsequent sections.
One of the considerations when taking this approach is that any configuration changes required after attachments are made are done at the composite or service bus components. The policy is not editable within the EM WSM Policies, so any updates are done at the attached endpoint. This could be potentially unmanageable if there is multiple policy attachments and frequent global types of changes required.
SOA Suite
Within the SOA Suite, the new PII policy can be attached to a composite service and reference, providing encryption and decryption on the composite perimeter:

As noted in the Oracle documentation: PIIs encrypted in one SOA composite application cannot be decrypted in another SOA composite application. You must decrypt PIIs when an encrypted message leaves the composite.
There are two ways that the OWSM PII policy can be attached to a composite services and references, the first is within JDeveloper, the second is within EM. To add the policy in JDeveloper, right click on the service or reference in the composite editor, select Encrypt Sensitive Data:

The wizard provides the ability to select fields within the message to be encrypted/decrypted (for two way service, you will need to provide both the input and output fields to be encrypted/decrypted):

The benefit of adding it within JDeveloper is that the expression editor is provided, allowing for easy selection of the elements to be encrypted/decrypted. But caution should be heeded when adding policies within JDeveloper. If changes are made to the configuration within EM, they will be lost the next time the composite is deployed. Also, currently only the existing policy (pii_security_policy) can be added within JDeveloper, not allowing for a cloned policy to be applied.
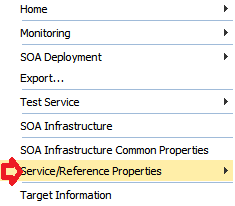
To attach policies in EM, right click on the composite, and select Service/Reference Properties:
Choose the Policies tab, then Attach/Detach in the lower pane:

Select the provided policy (oracle/pii_security_policy) or the cloned policy, Attach, then Ok:

If the pii_security_policy is selected, the next step is to set the encryption properties by Overriding the Policy Configuration:

If the cloned policy is selected, the encryption properties should be set within the configuration page of the policy in the WSM Policies page (not at the attached endpoint). For this scenario, the properties would be extended, adding additional XPaths and namespaces to the existing, separated by commas.
Conversely, overriding the pii_security-policy at the attachment endpoint would require only values necessary for the given endpoint.
The following encryption properties were applied to the composite in the first example:

With this policy applied, the same data shown in clear text in the first example will now be displayed encrypted in the audit trail:

Service Bus
Within the service bus, the policies are attached at the perimeter, at the proxy and business service. The data is encrypted/decrypted, protecting sensitive data within the service bus pipelines and split/joins. This prevents any sensitive data from being displayed in clear text in logs or console.
There are a couple of ways to attach the PII policy to a Service Bus proxy or business service. The first, like a SOA composite, is within EM. Navigate to the Service Bus project in EM, then select the business service or proxy within the Operations tab. Within the Policies tab, select Attach/Detach, then the policy to attach (these steps are the same as attaching a policy to a SOA composite noted above).
The other way to attach the PII policy to a Service Bus project is within the development environment. Both JDeveloper and the Service Bus Console provide the mechanism to attach policies, but only JDeveloper will be discussed below.
In JDeveloper, right clicking on the proxy or business service in the overview editor will provide a link to the Policies tab:

Select the ‘From OWSM Policy Store’ radio button. Be sure to scroll down far enough within the Policies tab to view the Personally Identifiable Information configuration:

Once the Add icon is selected, the wizard will pop up allowing you to select the policy (pii_security_policy or cloned policies):

The encryption properties that will override the values within the policy can then be specified.
Like the SOA composite, attaching a policy within the development environment should be done with caution. Reasons for this are the same as with a SOA composite. Along with this is another consideration. When a cloned policy is attached and configured within JDeveloper, any changes to the encryption properties will overwrite any existing properties during deployment.
When configuring the encryption properties within EM, the XPaths and namespaces are entered without the benefit of the expression editor within JDeveloper. One way to make sure these values are correct, is to go thru the steps of adding within JDeveloper, then copy the XPaths and namespaces into the configuration in EM. Then, delete the policy within JDeveloper before deploying.